Capture Applicant Data
Job applications received due to a job posting are stored in separate files linked with the job posting.
The "Applicant Management > Job Applications" Module
Job applications are created and managed in the Job applications scope of the Applicant Management module. In the navigation pane, choose the sub-outbar Job applications via the Applicant management outbar.

The corresponding folder tree appears in the navigation pane above the outbars. The structure of the Job applications folder tree is identical to that of the Job postings folder tree.
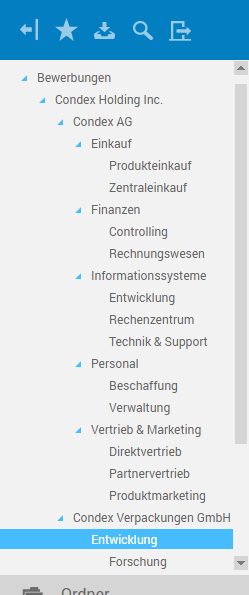
When creating an application file from a job posting, that file is saved in the same folder of the Job applications folder tree as the job posting in the Job postings folder tree, e.g. in the Condex Packaging, Inc./Development folder.
Create a job application
From a job posting
In the job postings file, a job application is created via the corresponding button in the toolbar.
From the "Job application" folder tree
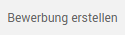
After you select a folder from the folder tree, the content of the folder is displayed in list view.
To create a new job application, choose the Create button above list view.

A new file named Job application opens in the details pane. When opening it, edit mode is enabled, so you can immediately start entering data. The different tabs now allow entering the corresponding information.
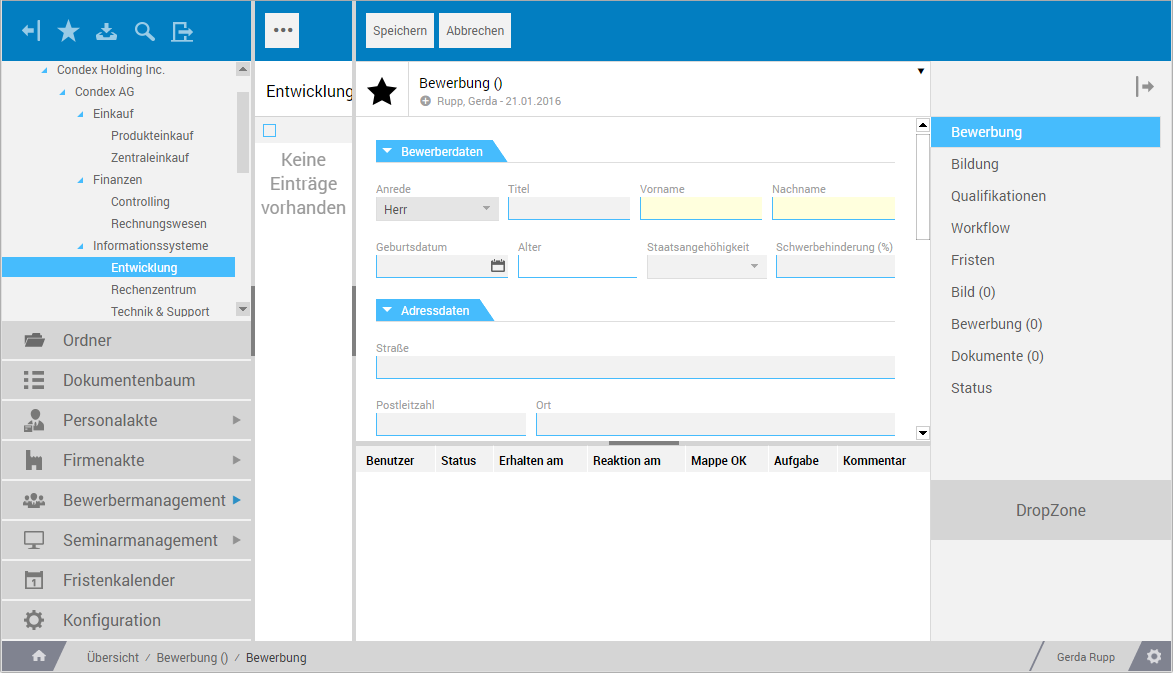
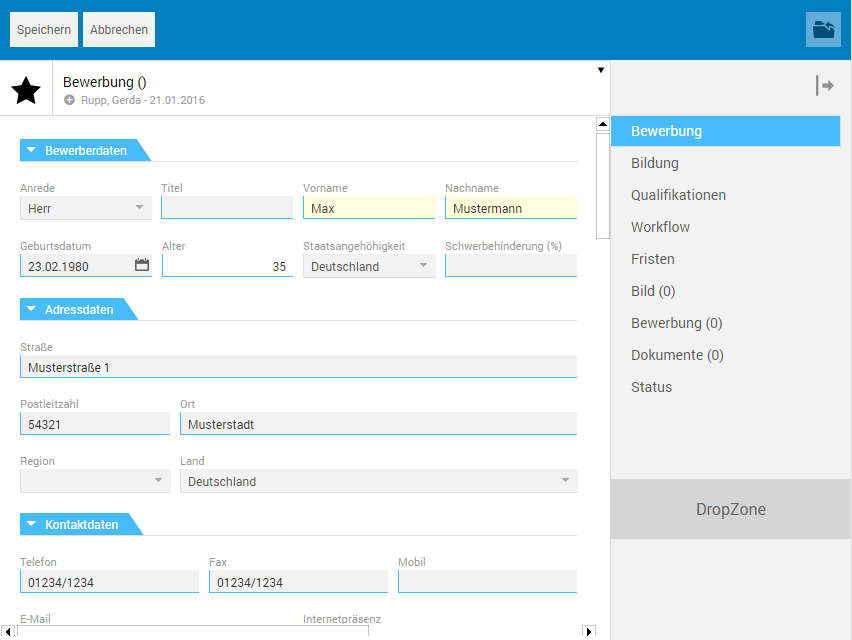
The "Job application" tab
This tab is intended for capturing applicant data, i.e. personal, address and contact information as well as general job application data.
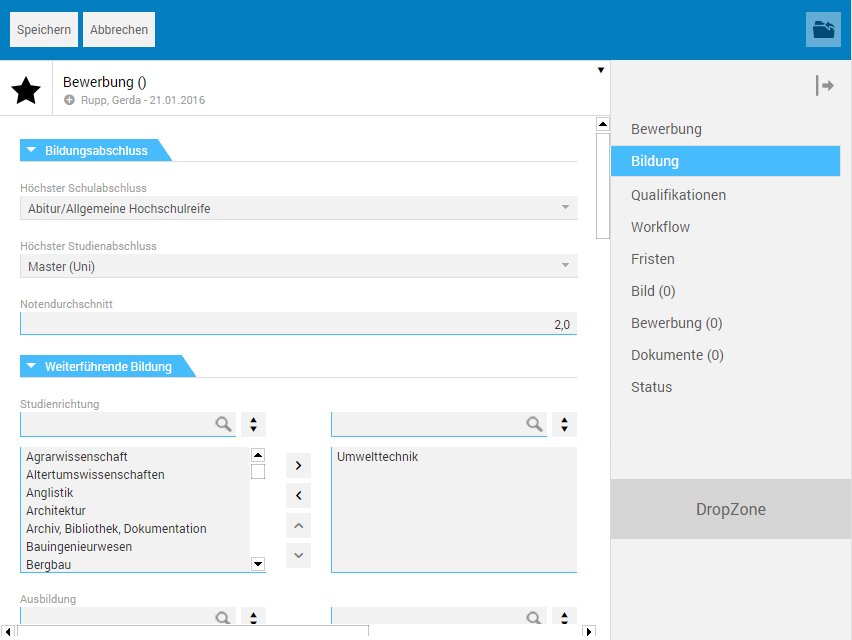
The "Education" tab
This tab allows entering information on the applicant's education and professional experience via default selection lists.
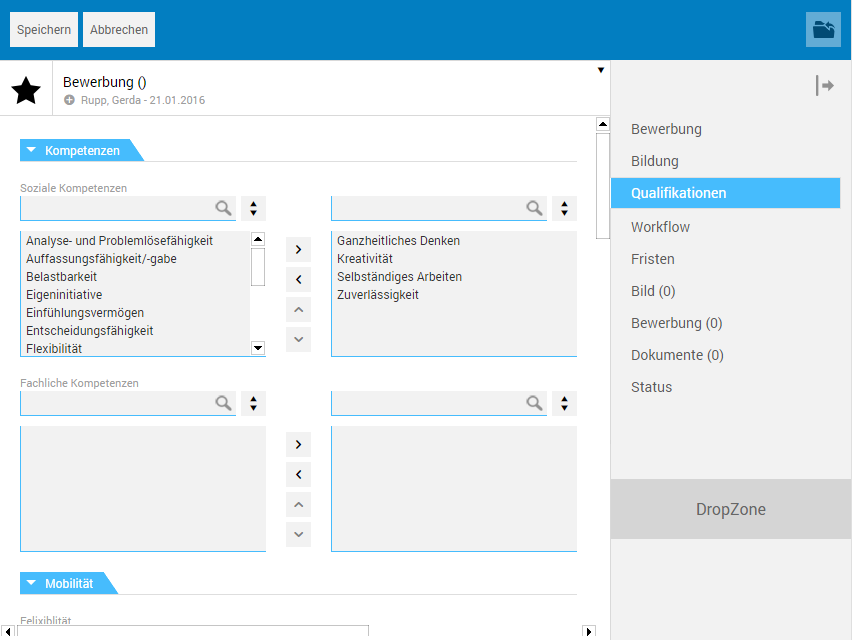
The "Qualifications" tab
This tab allows entering information on the applicant's competencies and mobility via defaulted selection lists.
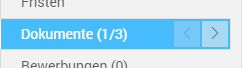
The Document tab
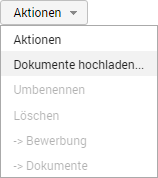
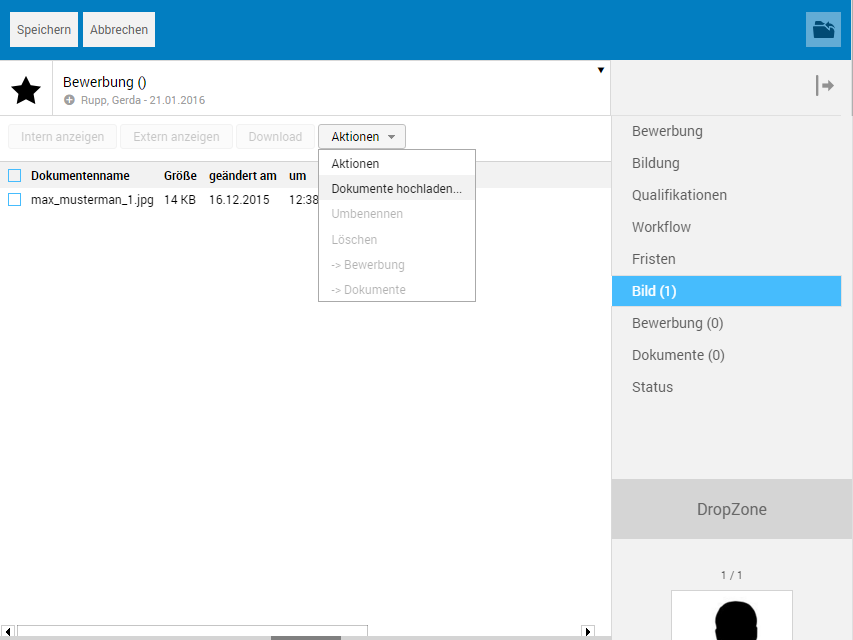
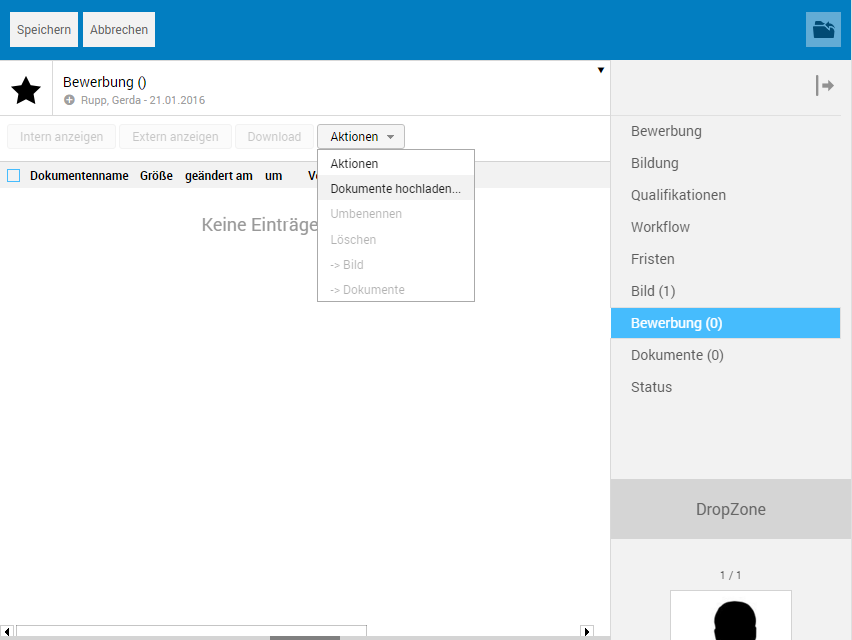
The Image, Job application and Documents tabs allow inserting text and image files of any format into the file from the file system or the desktop. This can be performed either via the Actions menu using the Upload documents function, or using drag and drop via the DropZone, to be found below the tab selection.
After you insert a data file, it is directly displayed. To insert another data file, you have to go from file view to list view because the functions for inserting are not available in file view. To do this, in the tab selection, click again the respective tab entry, e.g. Image.
If a tab contains multiple data files, buttons will appear in the tab selection which let you switch between data files.
The "Image" tab
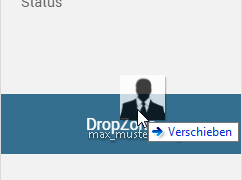
This tab allows inserting the applicant photo into the file using drag and drop or the Upload documents action (see above).
The photo is then displayed below the DropZone regardless of which tab is active.
The "Job application" and "Documents" tabs
These tabs allow inserting the job application documents and other job application-related documents into the file using drag and drop or the Upload documents action (see above).
Save job application
After you insert the desired files, editing the job application in terms of content is complete. The file can be saved via the corresponding button in the toolbar.

Edit mode automatically terminates when saving, and you are taken to view mode. Moreover, a corresponding entry is created for the new file in list view. The first and last name of the applicant is used as a title for the file, e.g. Job application Sam Sample. Various functions are available via the Actions menu for further processing the job application. You can, for instance, print the file as a PDF file, define deadline dates (see below), or send it.
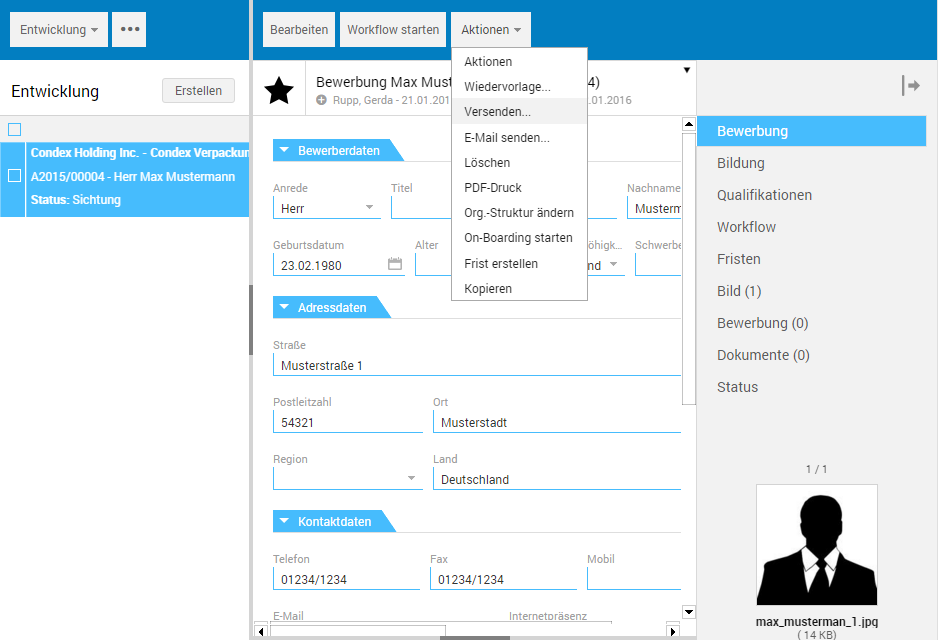
Send job application
The Send function on the Actions menu allows forwarding job applications within an organization, e.g. for reviewing it, to the responsible division manager.
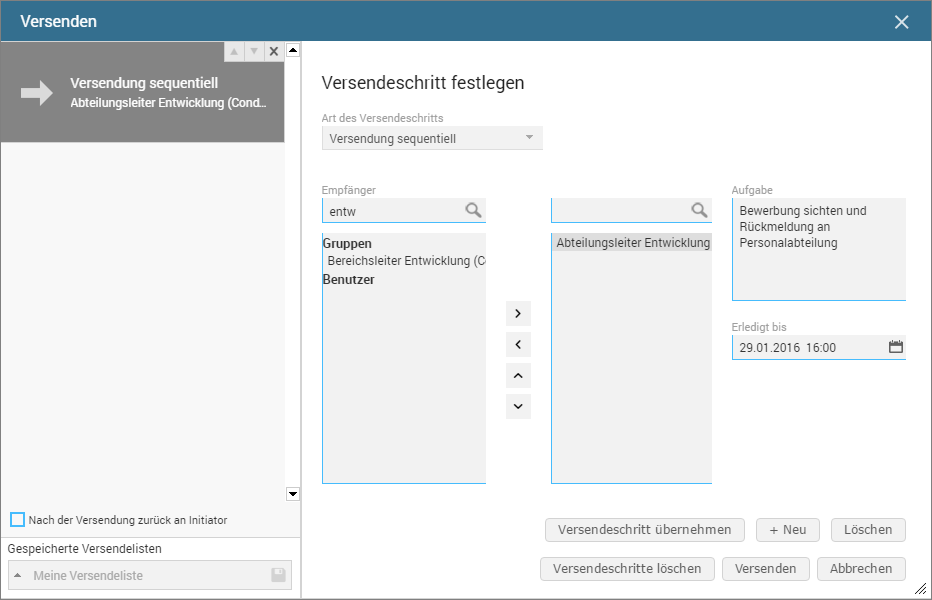
Recipient
This field allows filtering the desired recipient from the associated list of all recipients. By entering one or more letters, the selection is limited, respectively, to entering the corresponding recipients. Transfer the recipient afterwards by double-clicking to the selection list on the right. If necessary, a task and, under Done by, a specified date can also be sent.
Send
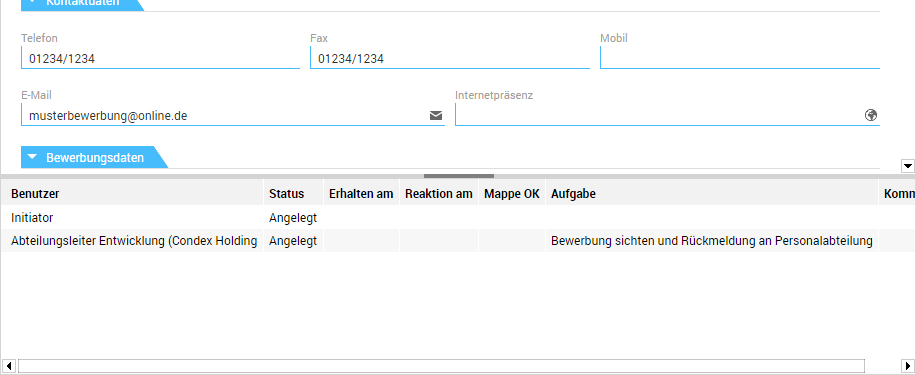
This button starts transmission. Transmission history is automatically logged, and displayed at the bottom part of details view.
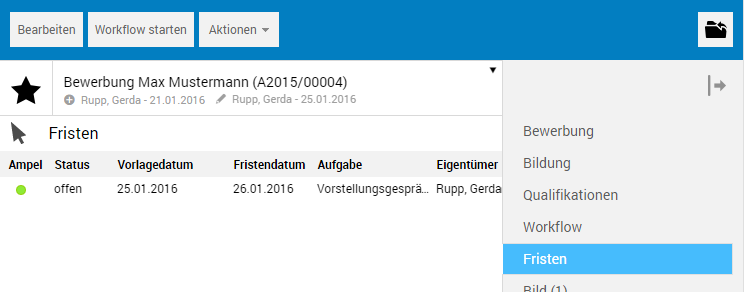
The "Deadline dates" tab
This tab is used to manage existing deadline dates referring to an application. Creating deadline dates, e.g. a deadline date that refers to an upcoming interview, is performed in view mode using the Create deadline date function on the Actions menu.
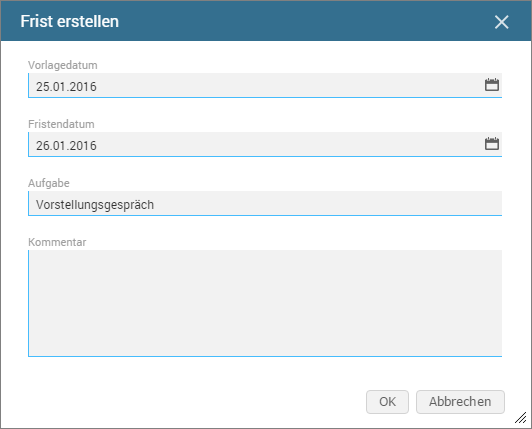
After you click OK to confirm this dialog, a file containing the deadline dates is created under the title Custom deadline date Job application Sam Sample. The Deadline dates tab is used to additionally create a link to that file. A traffic light system is used here to inform of the current status of the deadline date.
Clicking the link lets you switch to the file and edit the deadline data. This file can also be accessed from Deadlines.
All deadline dates created in EASY HR are managed under Deadlines, and can be viewed and edited here.
The "Status" tab
This tab is used to log all edits performed for a file.
