The "Posting" FastTab

The following table provides an overview of the individual fields and their meaning:
|
Field |
Meaning |
|
Reason code |
Corresponds to the same field in the document definitions. |
|
Document journal |
|
|
Post Document Entries Indirectly |
Corresponds to the same field in the document definitions. |
|
Document Journal Template |
Corresponds to the same field in the document definitions. |
|
Document Journal Name |
Corresponds to the same field in the document definitions. |
|
Reverse Journal |
|
|
Reverse on Transfer/Update |
This radio button is used to control whether and how the document entries (document link) will be reversed after transfer. Allowed options are:
Reversed document entries are written in the Document reversal entries table. Reversed document entries can be restored via the document journal. |
|
Reverse Journal Template |
This defines a journal template that is used to reverse the "old" document entries. |
|
Reverse Journal Name |
This displays the name of the journal template that is used to reverse the "old" document entries. |
Manual transfer
With manual transfer, you can select individual and transfer document entries (document link). The starting point for manual transfer are the ECM Transfer journals.
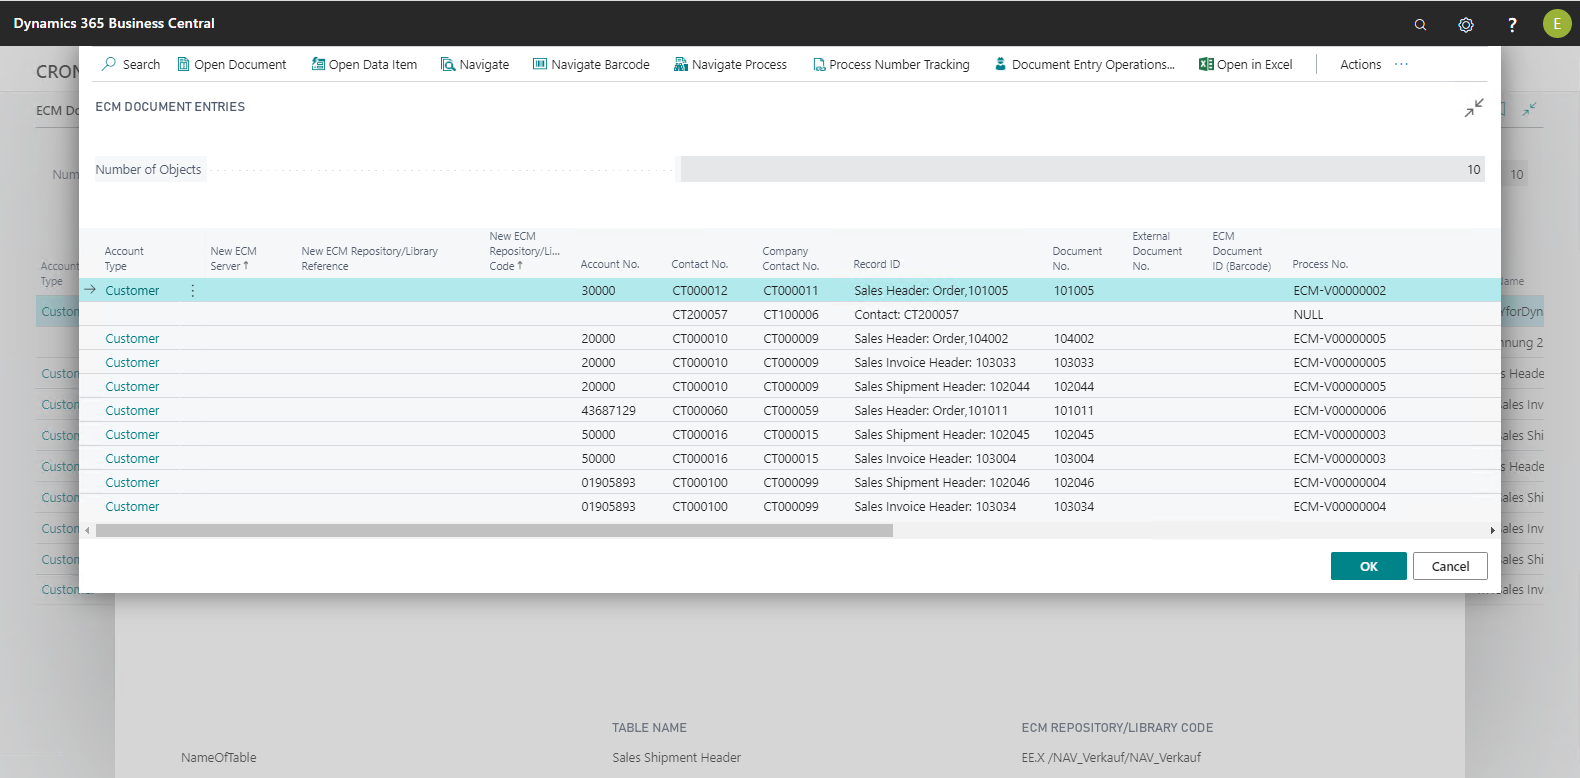
The Transfer Entries function allows you to select the document entries to be transferred which will be transferred to the transfer journal.
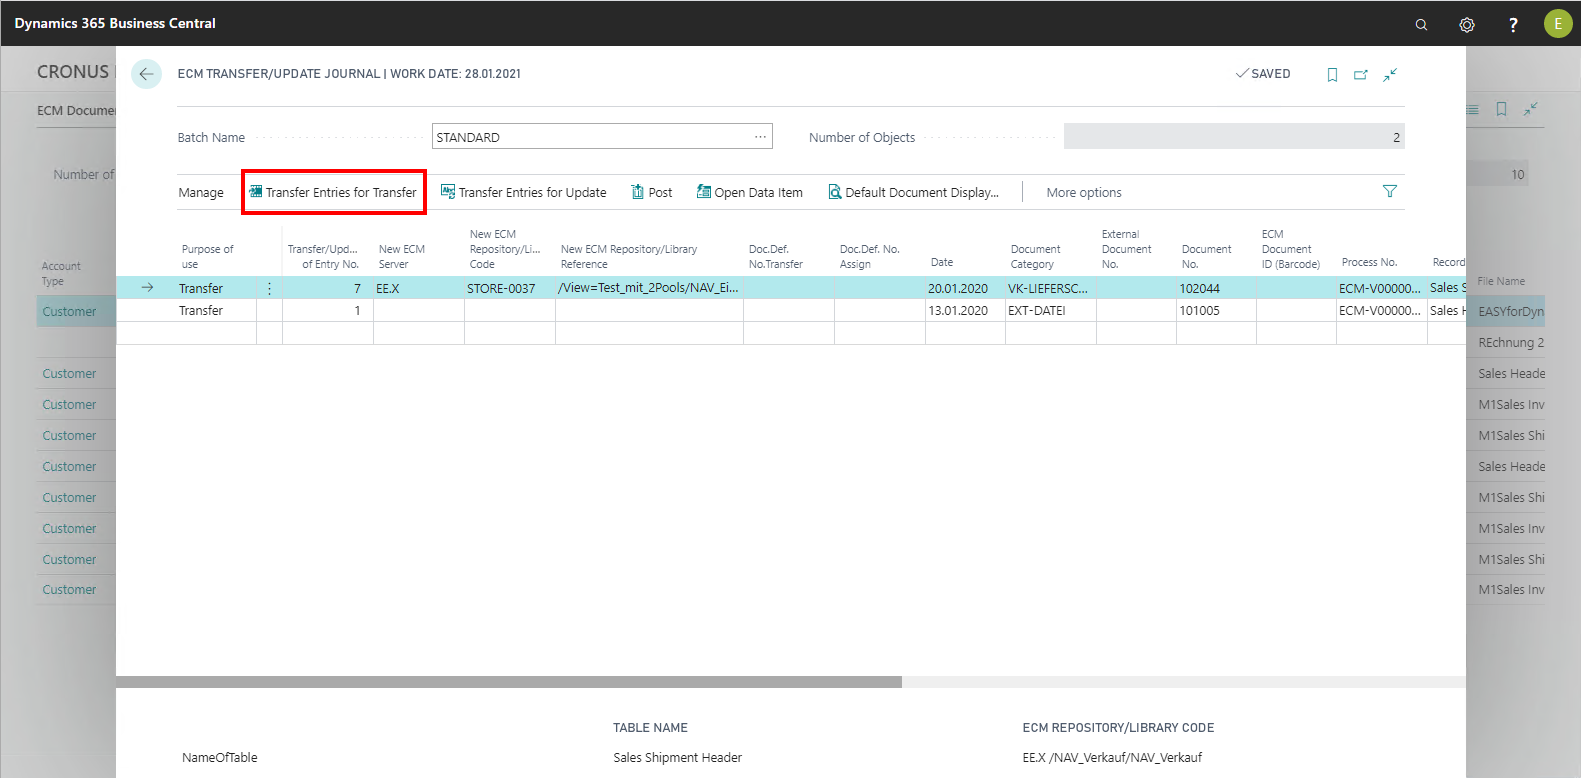
In the Document entries table, you have to select the document entries to be transferred, and transfer them to the Transfer journal by clicking OK.
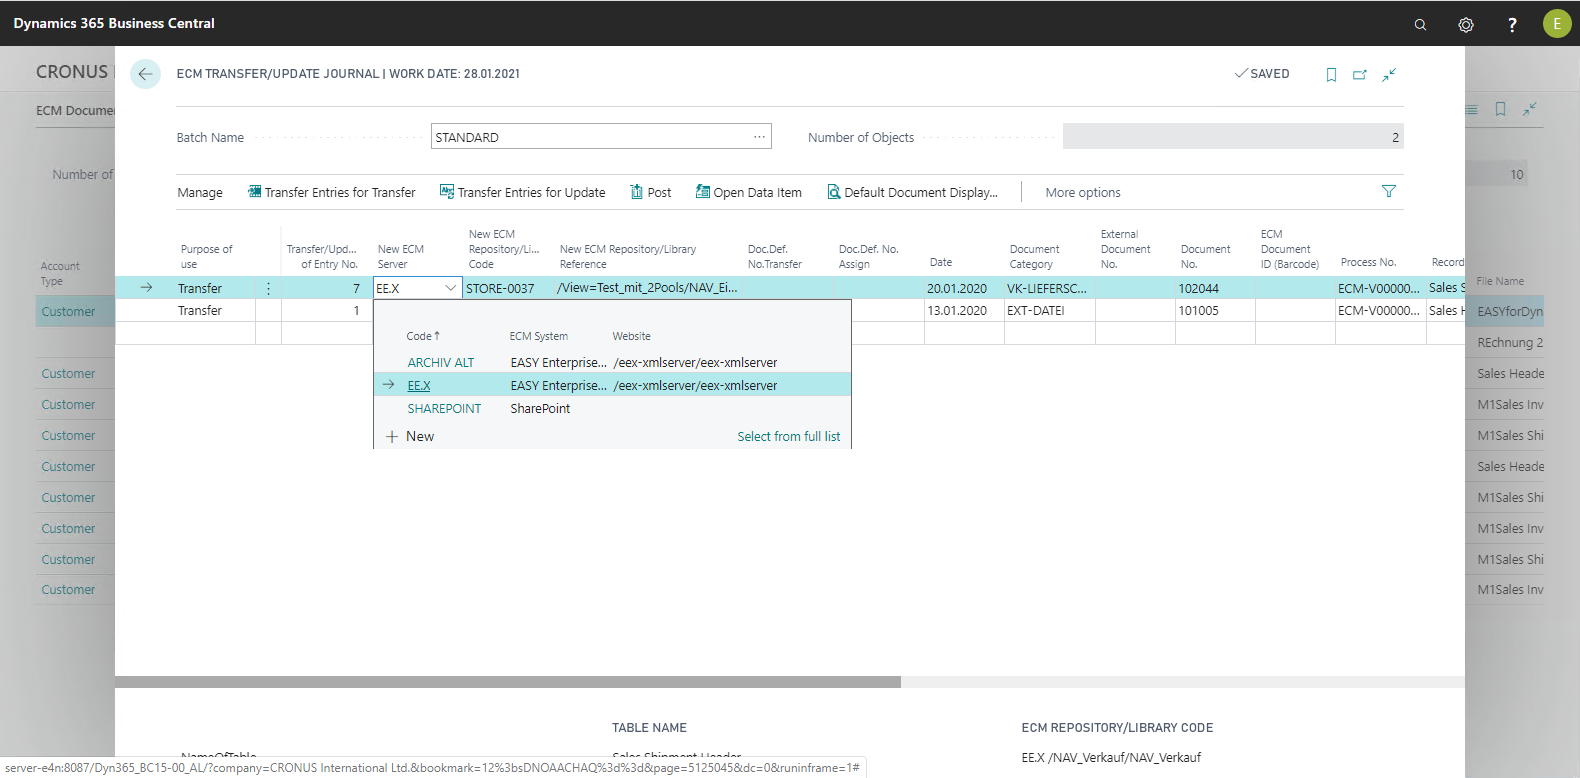
After the selected document entries have been transferred to the Transfer Journal, you need to enter the archive to which to transfer the documents in the New ECM Server and ECM Library/Storage Code fields.
With the posting that follows, new lines for transfer are generated in the queue which are processed at a fixed interval. After successful processing, the associated document entries are automatically reversed or can be reversed via the reversal journal, depending on the setting in the corresponding transfer definition.
Direct transfer / migration
Direct transfer allows copying documents of an ECM library / storage to another ECM library / storage.
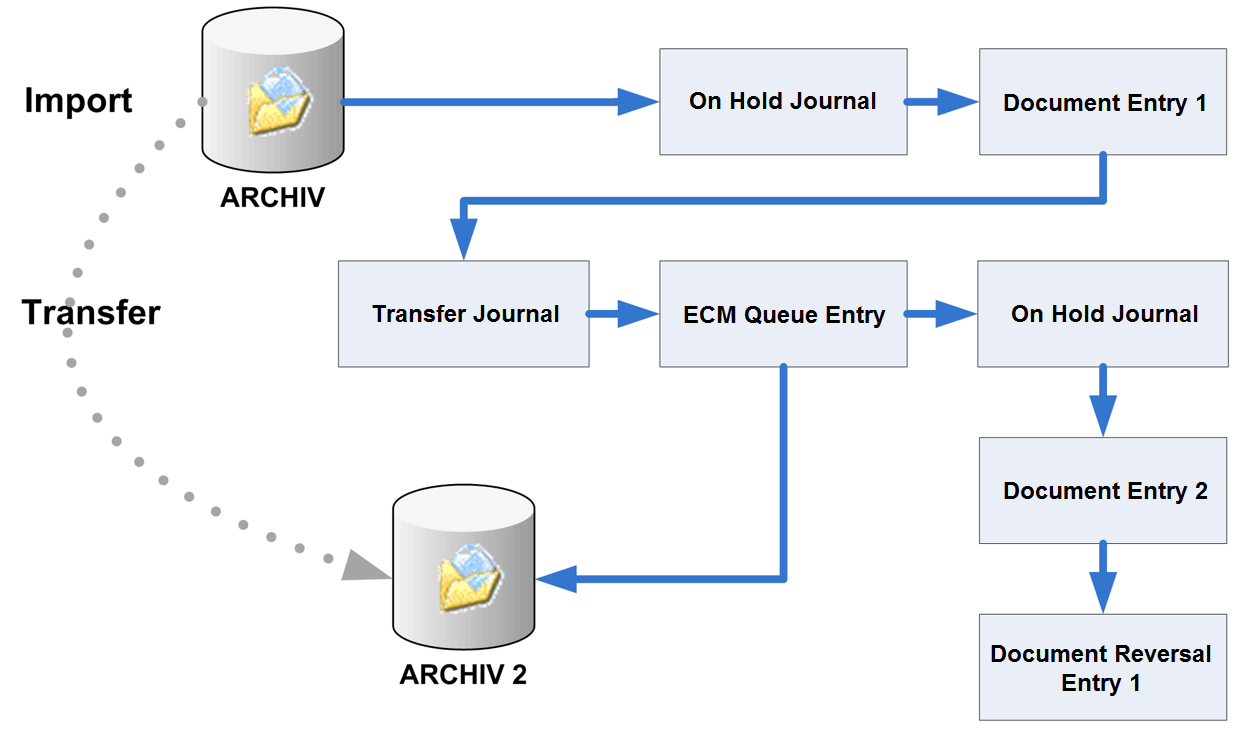
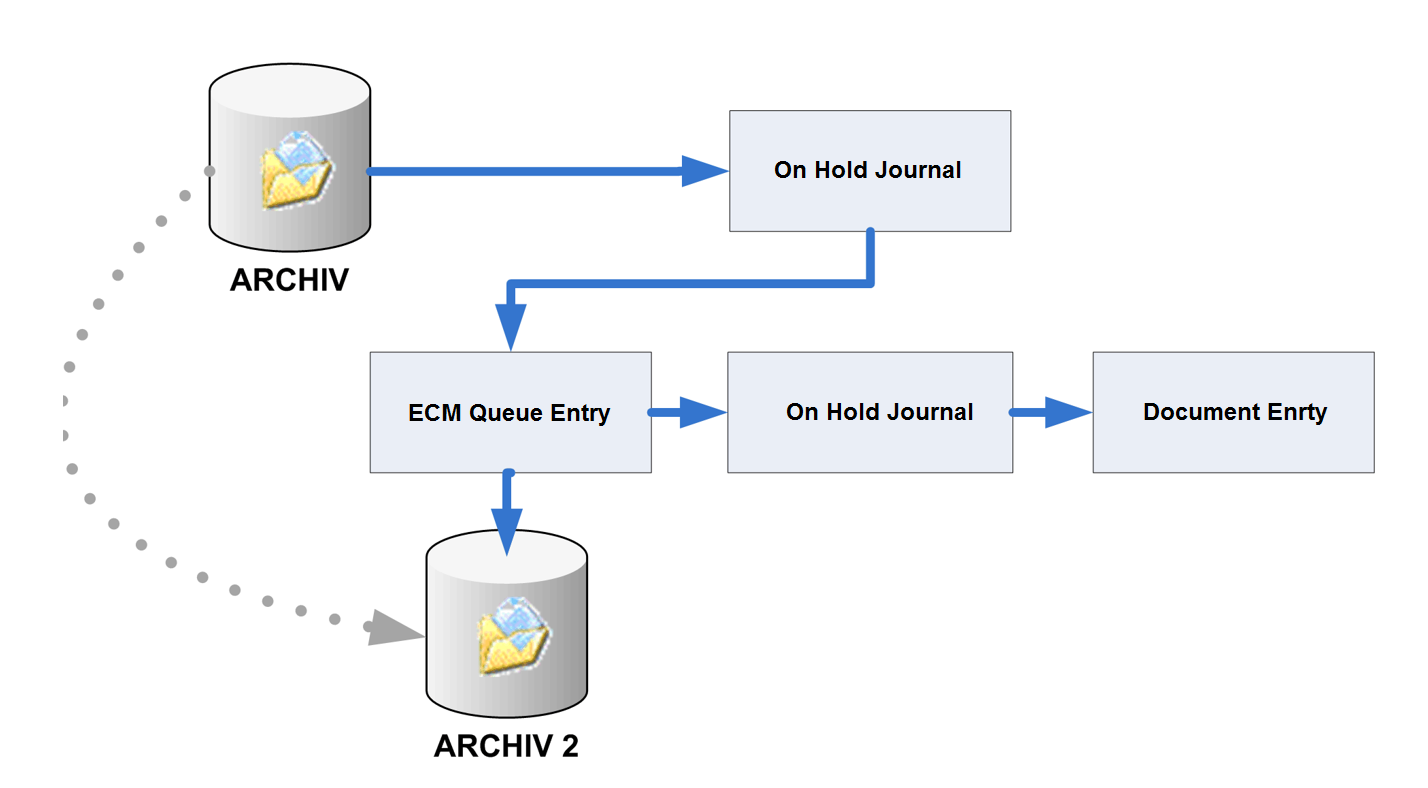
Processing traditional transfer
Monitor for Import ensures that the data of the documents are written in the On Hold Journal and assigned to a process. After assigning the data, the document entries 1 are posted with reference to the source library / storage. After that, transfer starts. The Transfer Journal is used to post, and a queue entry is generated for each document entry. When processing the queue, the documents are then copied to the library / storage 2, and then the document entries 2 with the references to the the library / storage 2 are generated via the On Hold Journal. The last step of the transfer is reversal of document entries 1 via the Reversal journal.
Processing direct transfer
With traditional transfer, various postings are performed which are not necessary for a scenario such as migrating an EASY ENTERPRISE.i archive to EASY Archive. With direct transfer, only two postings are performed, which has a significant advantage in terms of time. The records generated after import are therefore posted in the On Hold Journal with direct transfer; however, no document entry is generated, but a queue entry is directly generated in the direction of transfer. Only for the transferred document will a document entry be generated afterwards.
Example
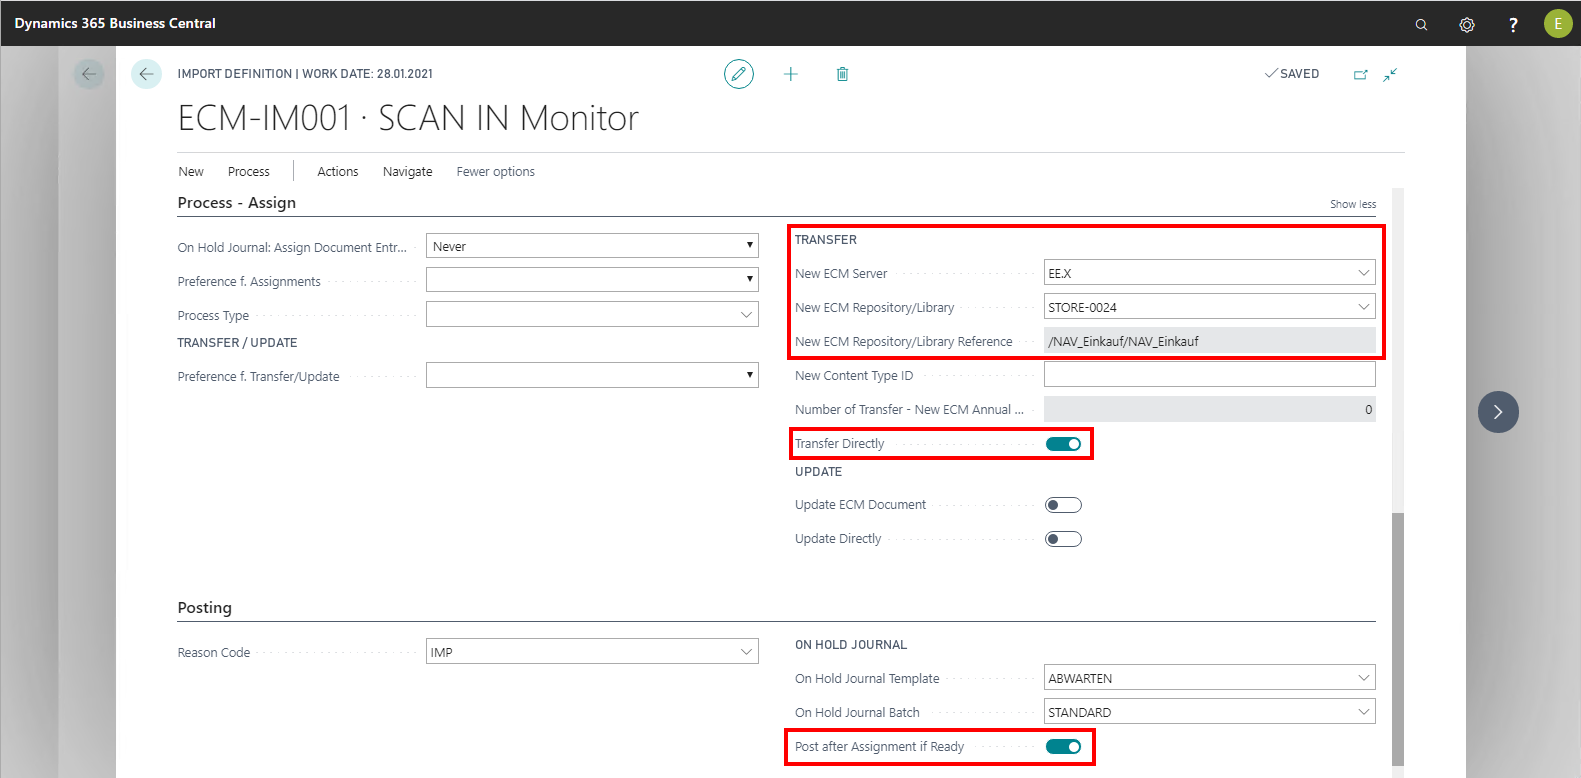
The documents from the Scan In store should be transferred to the Procurement archive directly upon successful assignment. In the import definition of the Scan in Monitor, under Transfer, you have to specify the target library / storage directly in the Process – Assign FastTab, and select the Transfer directly option. You also have to enable the Post after Assignment if Ready option on the Post FastTab, so that the imported records do not remain in the On Hold Journal.
In the transfer definition, the source library / storage is stored in the ECM Source Server Code and ECM Source Library/Storage Code fields.
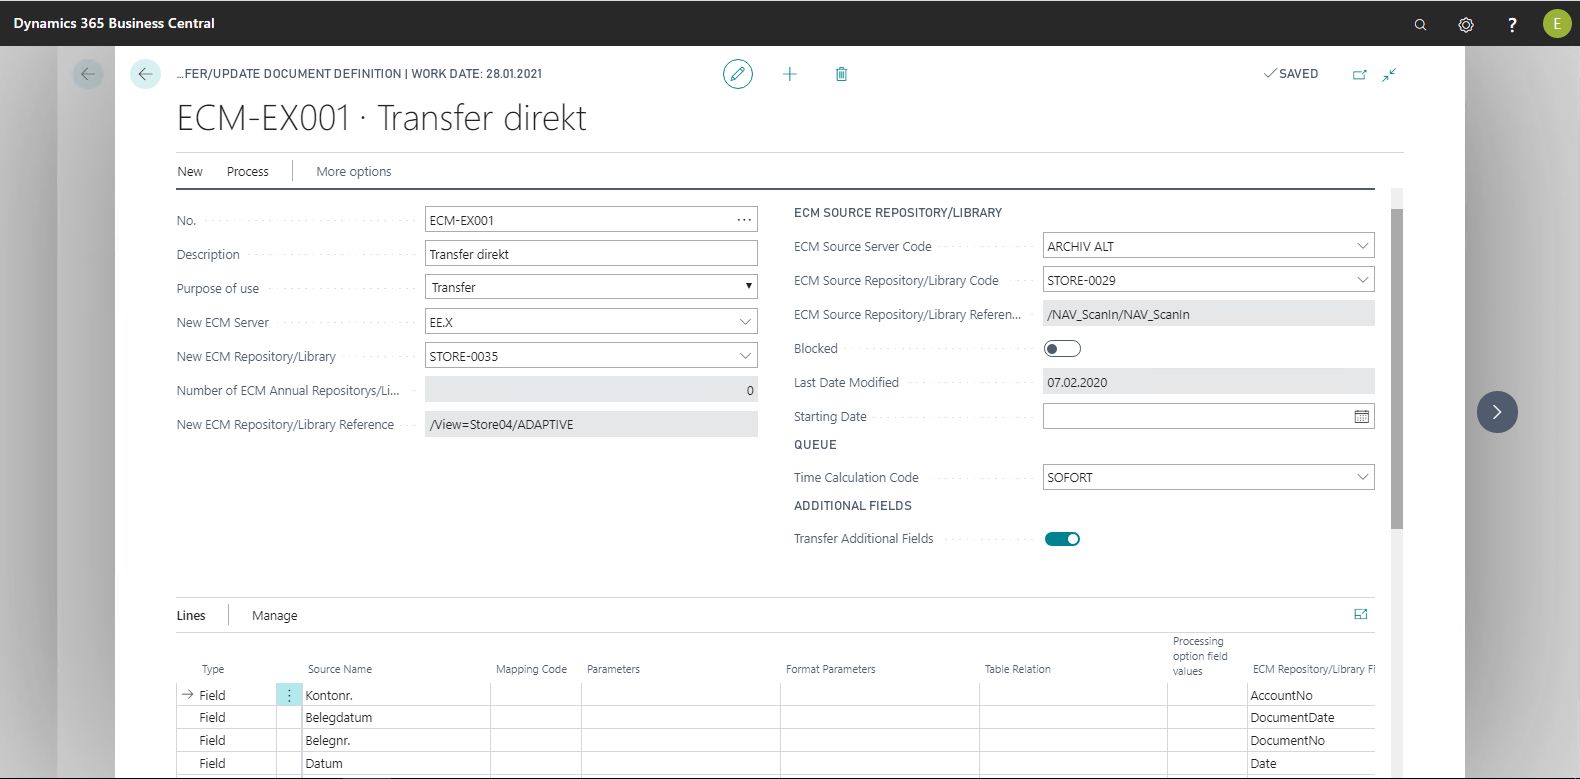
If the source library / storage is stored, you can populate the lines. If you select the Transfer type, you can select the fields of the source library / storage in the Source Field ID column.
Next time import is monitored, the documents are imported from the Scan In archive into the On Hold Journal and queue entries of the Transfer type are generated. These are then processed, i.e. the documents are transferred to the Purchasing archive. Document entries are then posted for the documents in the Procurement archive via which the documents in the Procurement archive can be accessed from Microsoft Dynamics 365 Business Central.