Import documents to customers
To import documents from the archive and add to a customer, the following setups are needed:
Setup of the import document definition
The import definition has to import the documents in the “On Hold Journal” and waits for the “Table ID” to be set, therefore the “Table ID” needs to be set as mandatory field. The source field IDs need to be set according to the archive:
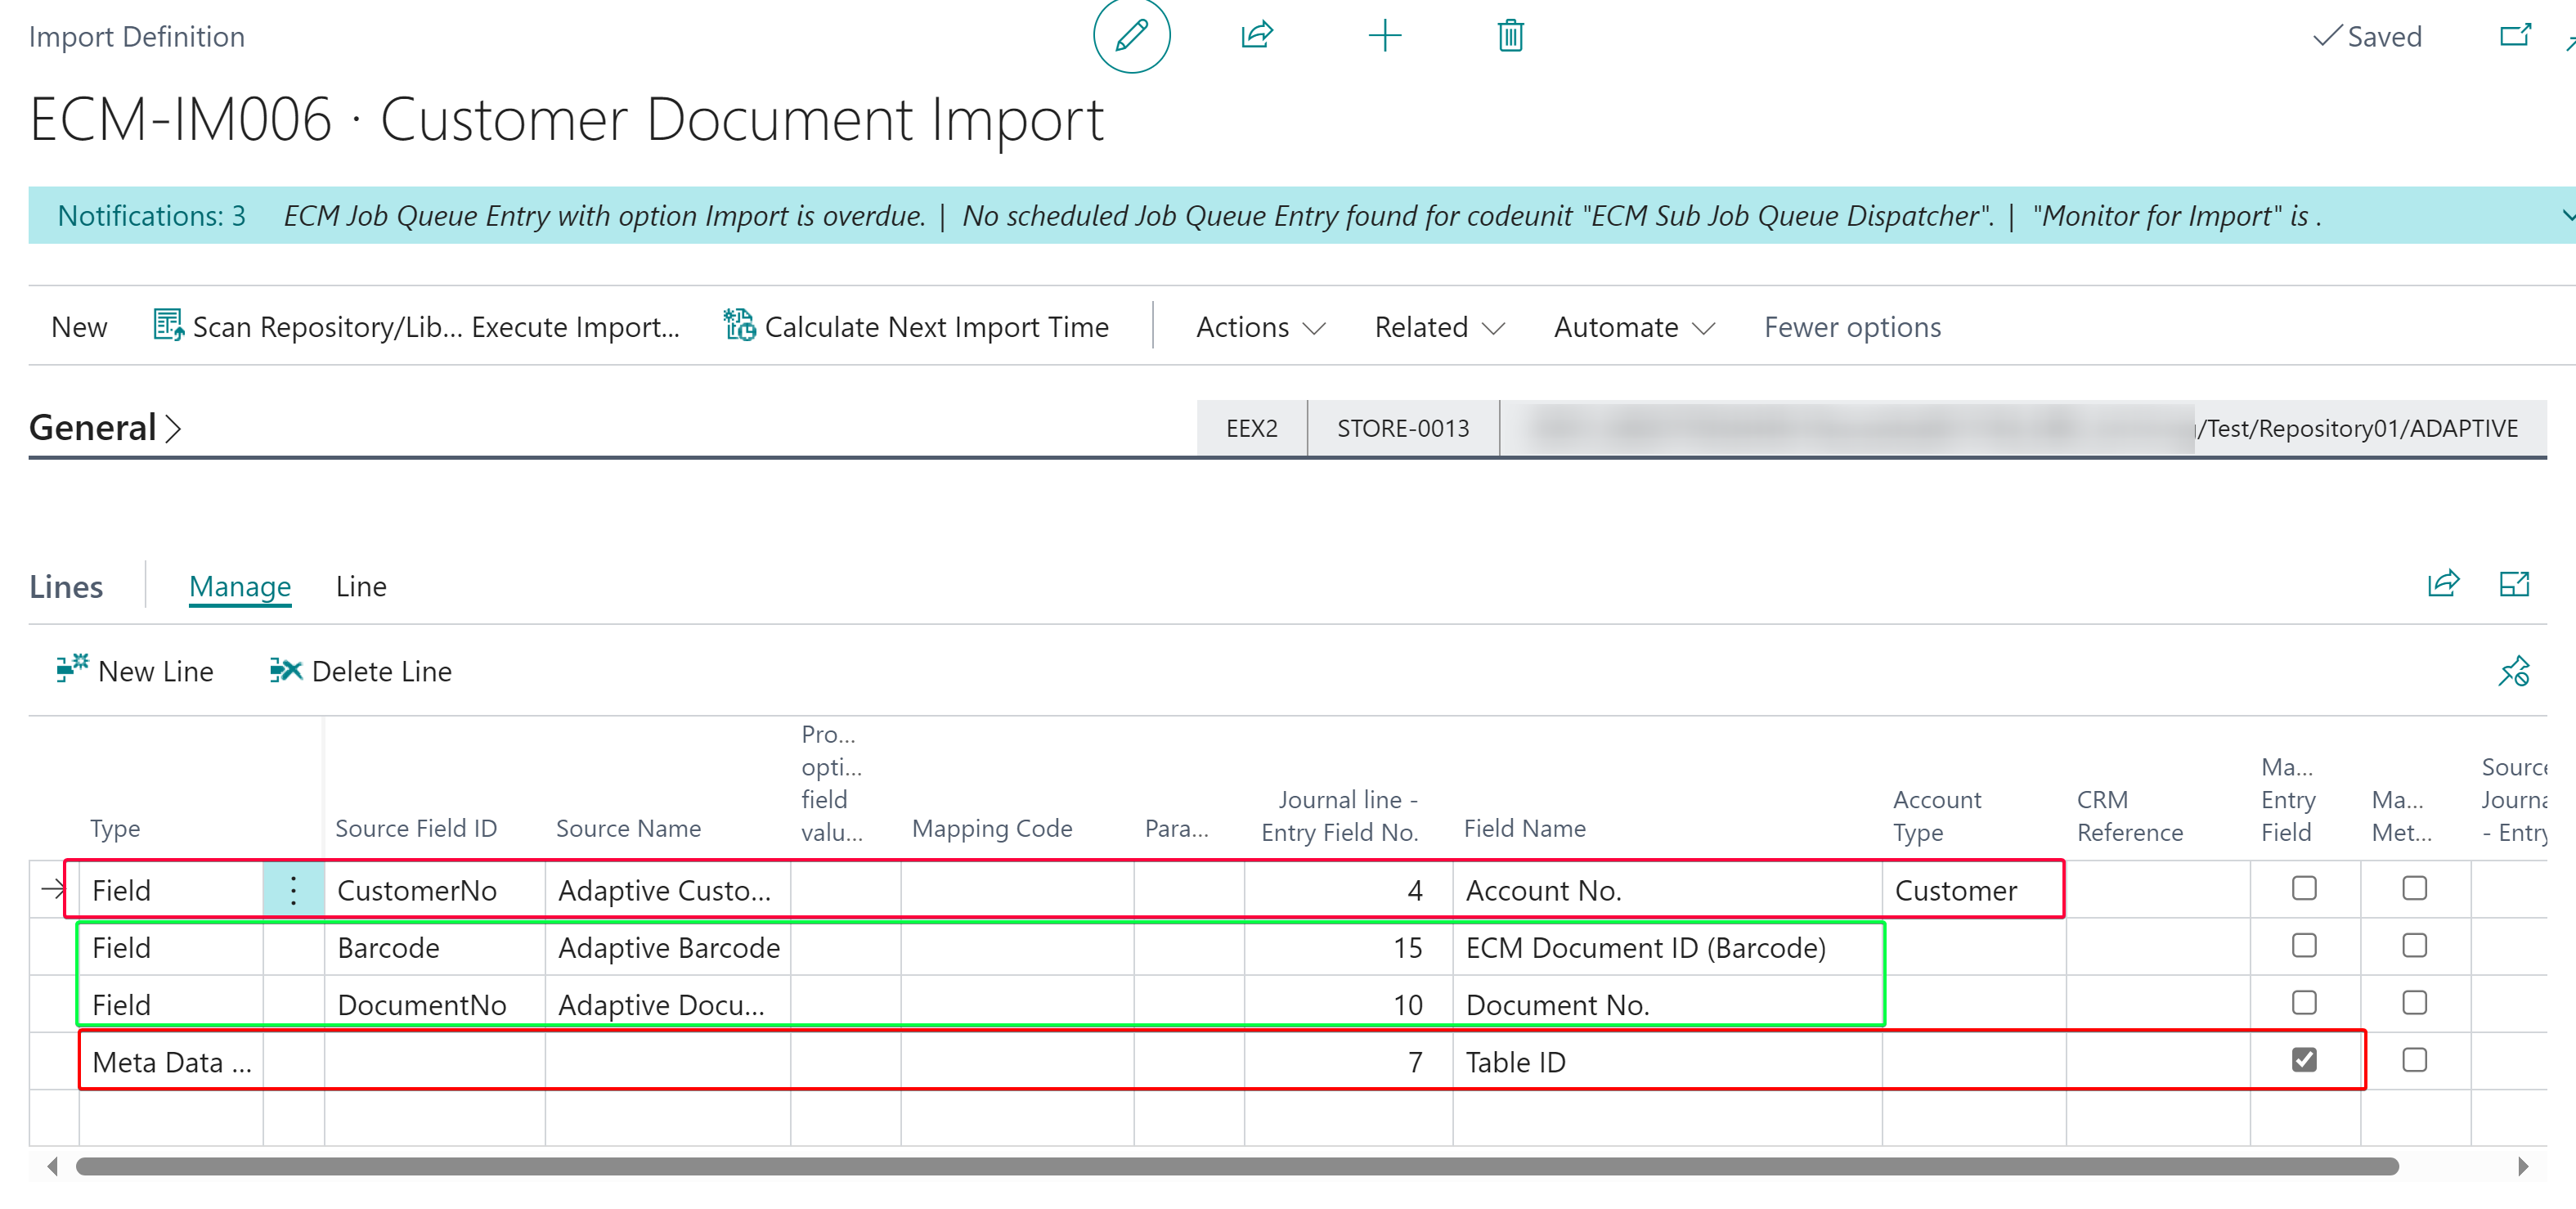
These are only example fields. For production usage we recommend using more fields.
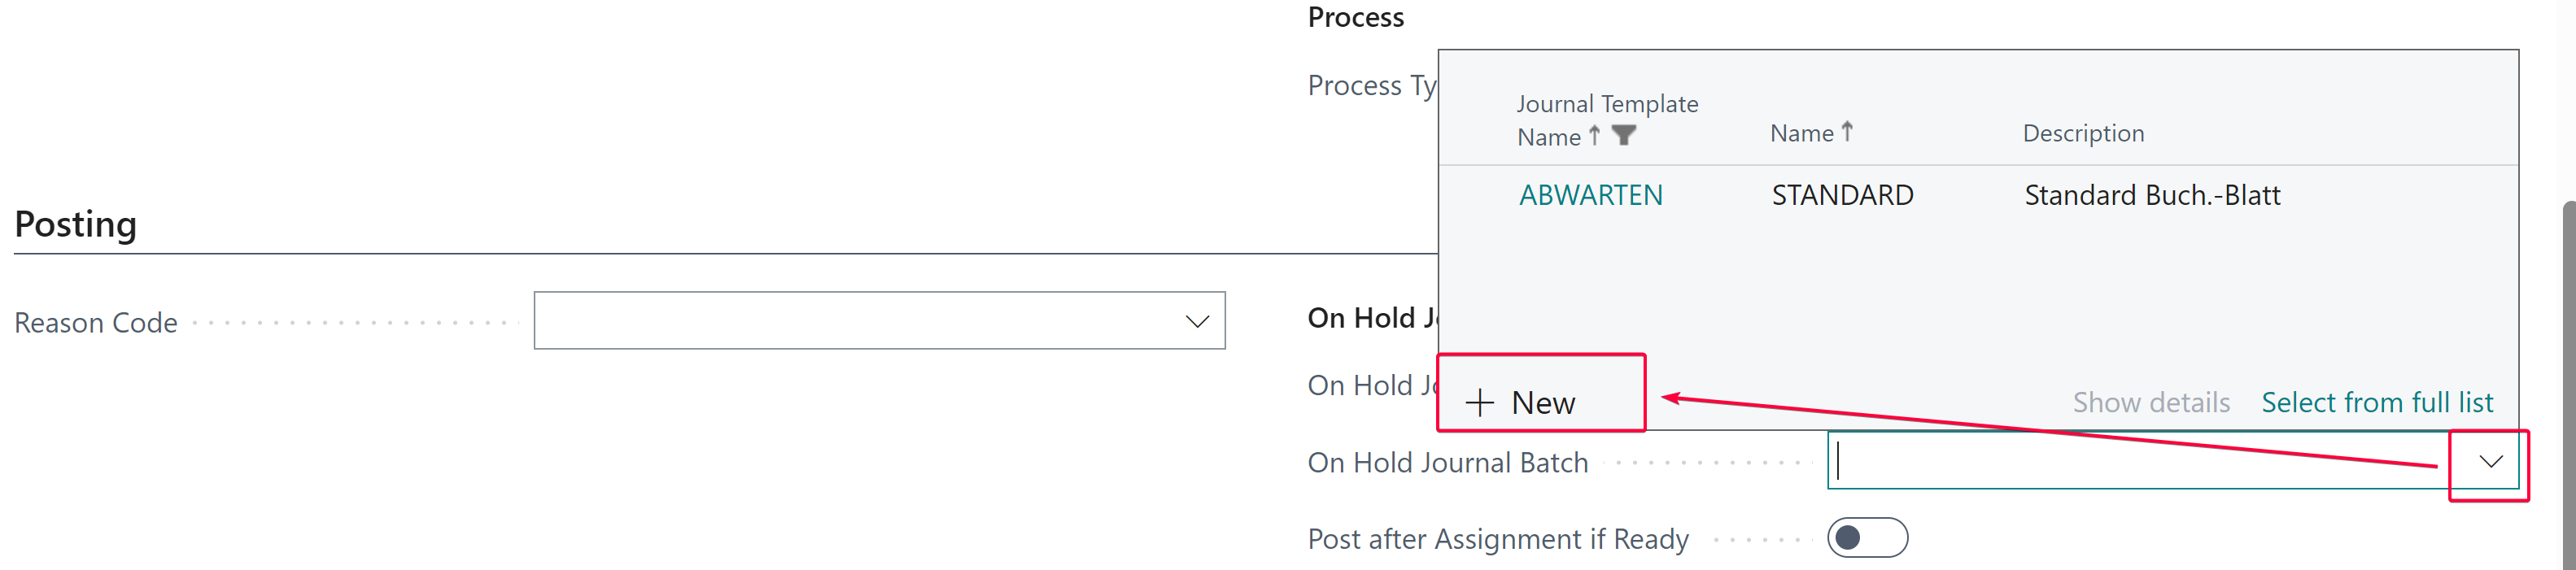
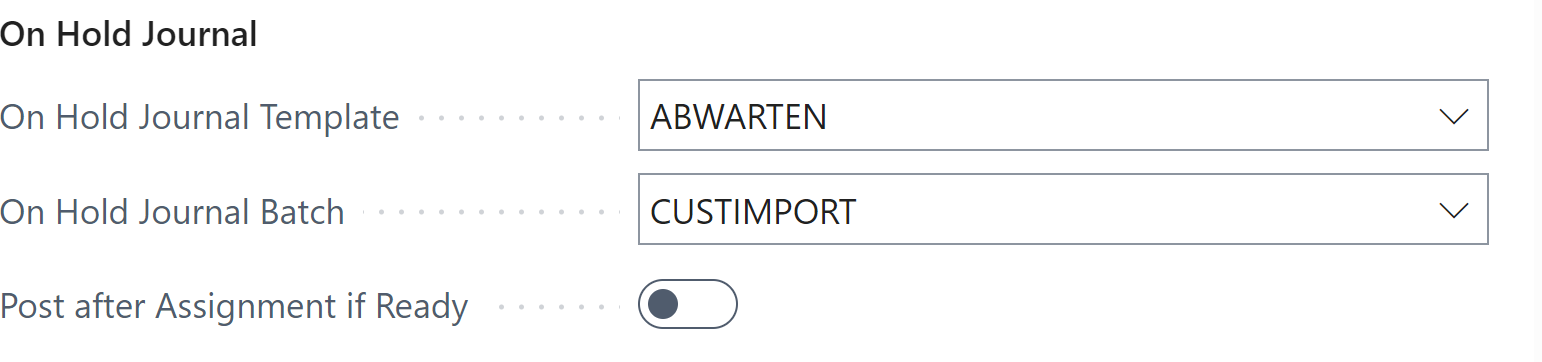
To make sure only documents from this definition are assigned to a customer, we create a new “On Hold Journal Batch”:
Enable the Import in the import definition
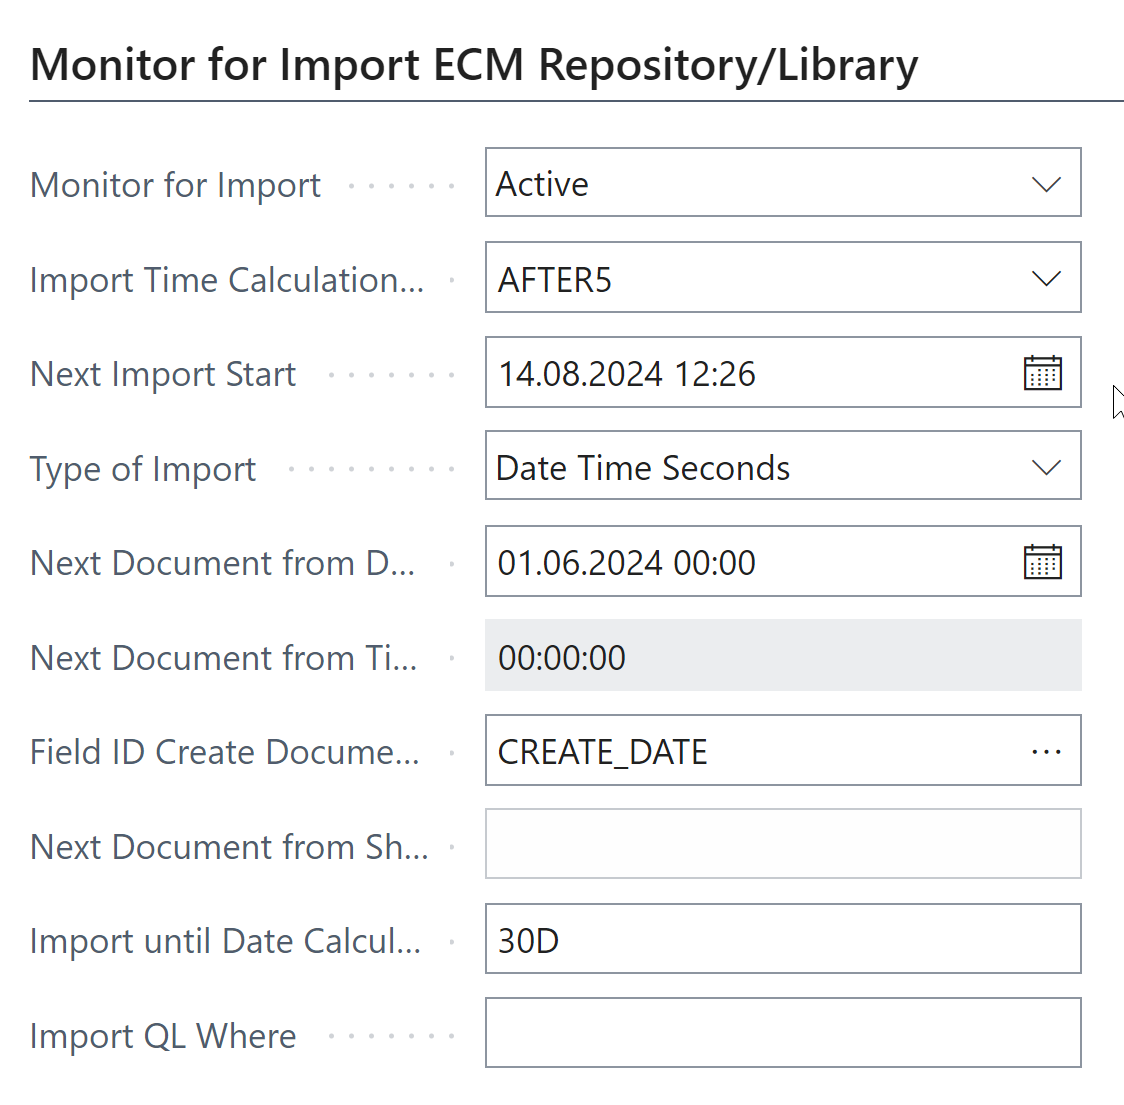
If more documents are saved in one large repository, you can filter with “Import QL”.
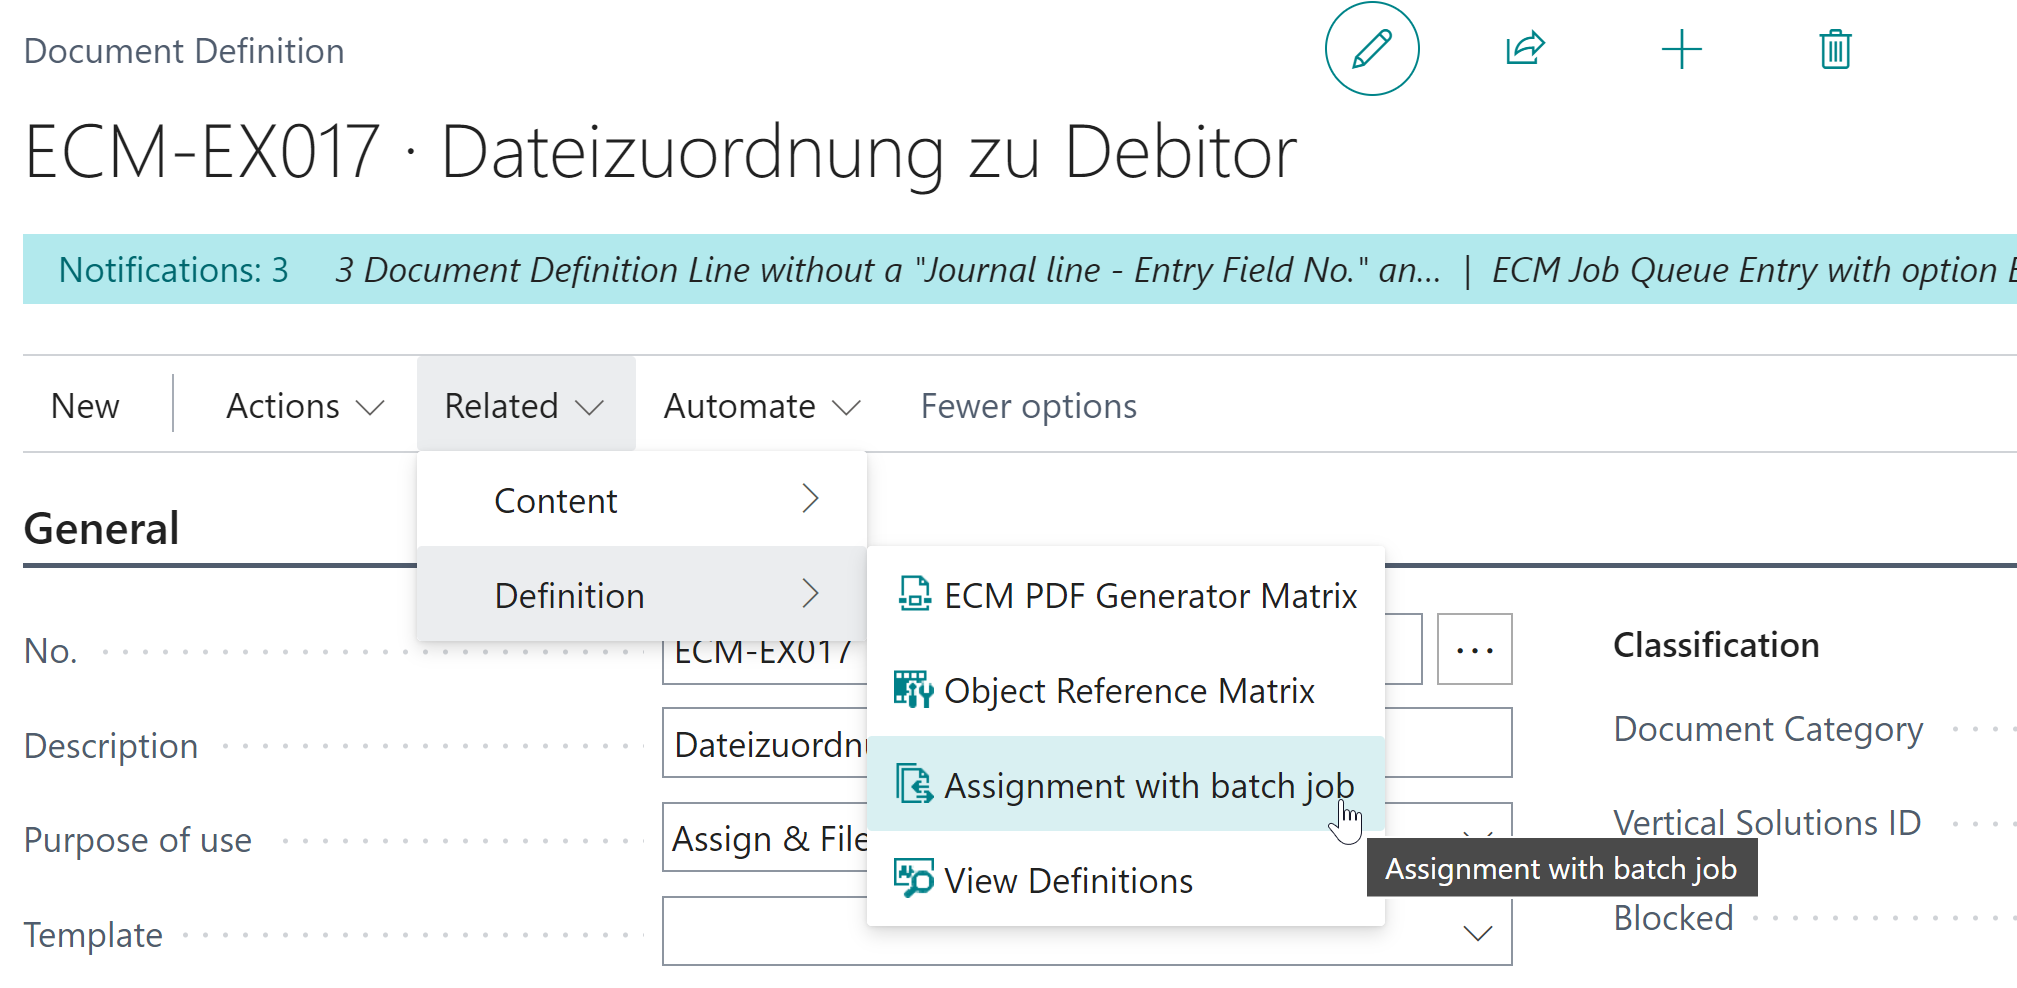
Setup of batch assignment
It needs to be defined, which export definition should be used, to assign the documents.
Go to the document definition of “Customers” and select the action “Assignment with batch job”:
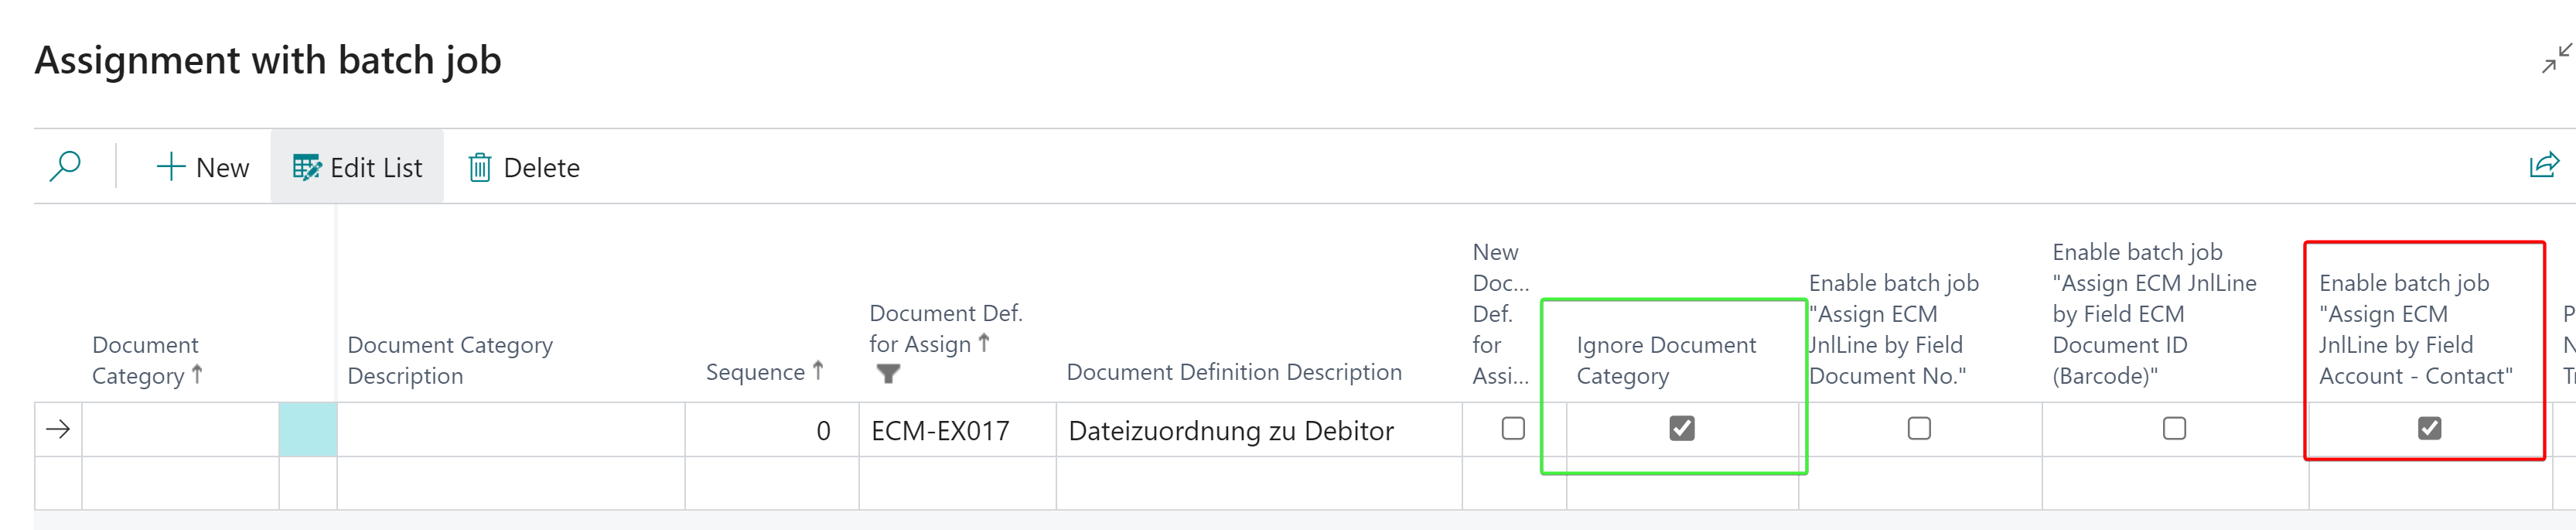
In the batch job, the “Enable batch job 'Assign ECM JnlLine by Field Account - Contact” needs to be set. If unknown document categories should be imported, “Ignore Document Category” must be set:
New ECM Job Queue Entry for batch assignment
Right now the documents will only be imported to the on hold journal, but not assigned to a customer. To activate it, the following line needs to be added:
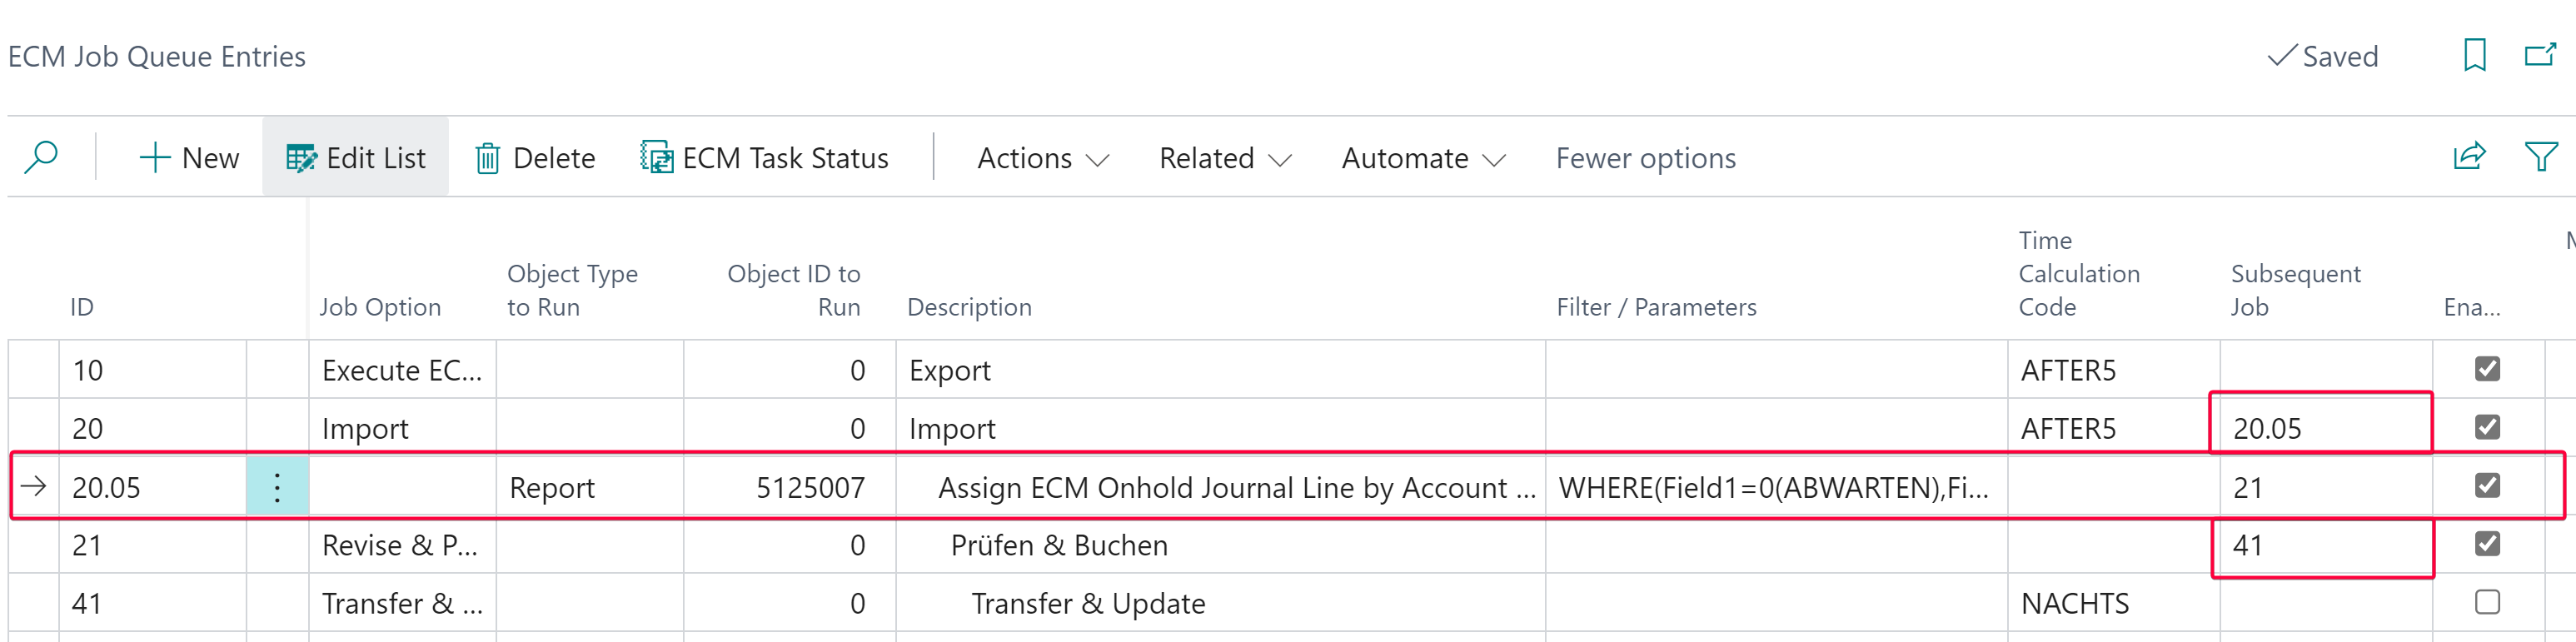
This job should run after import and before “Revise & Post”, please create it accordingly.
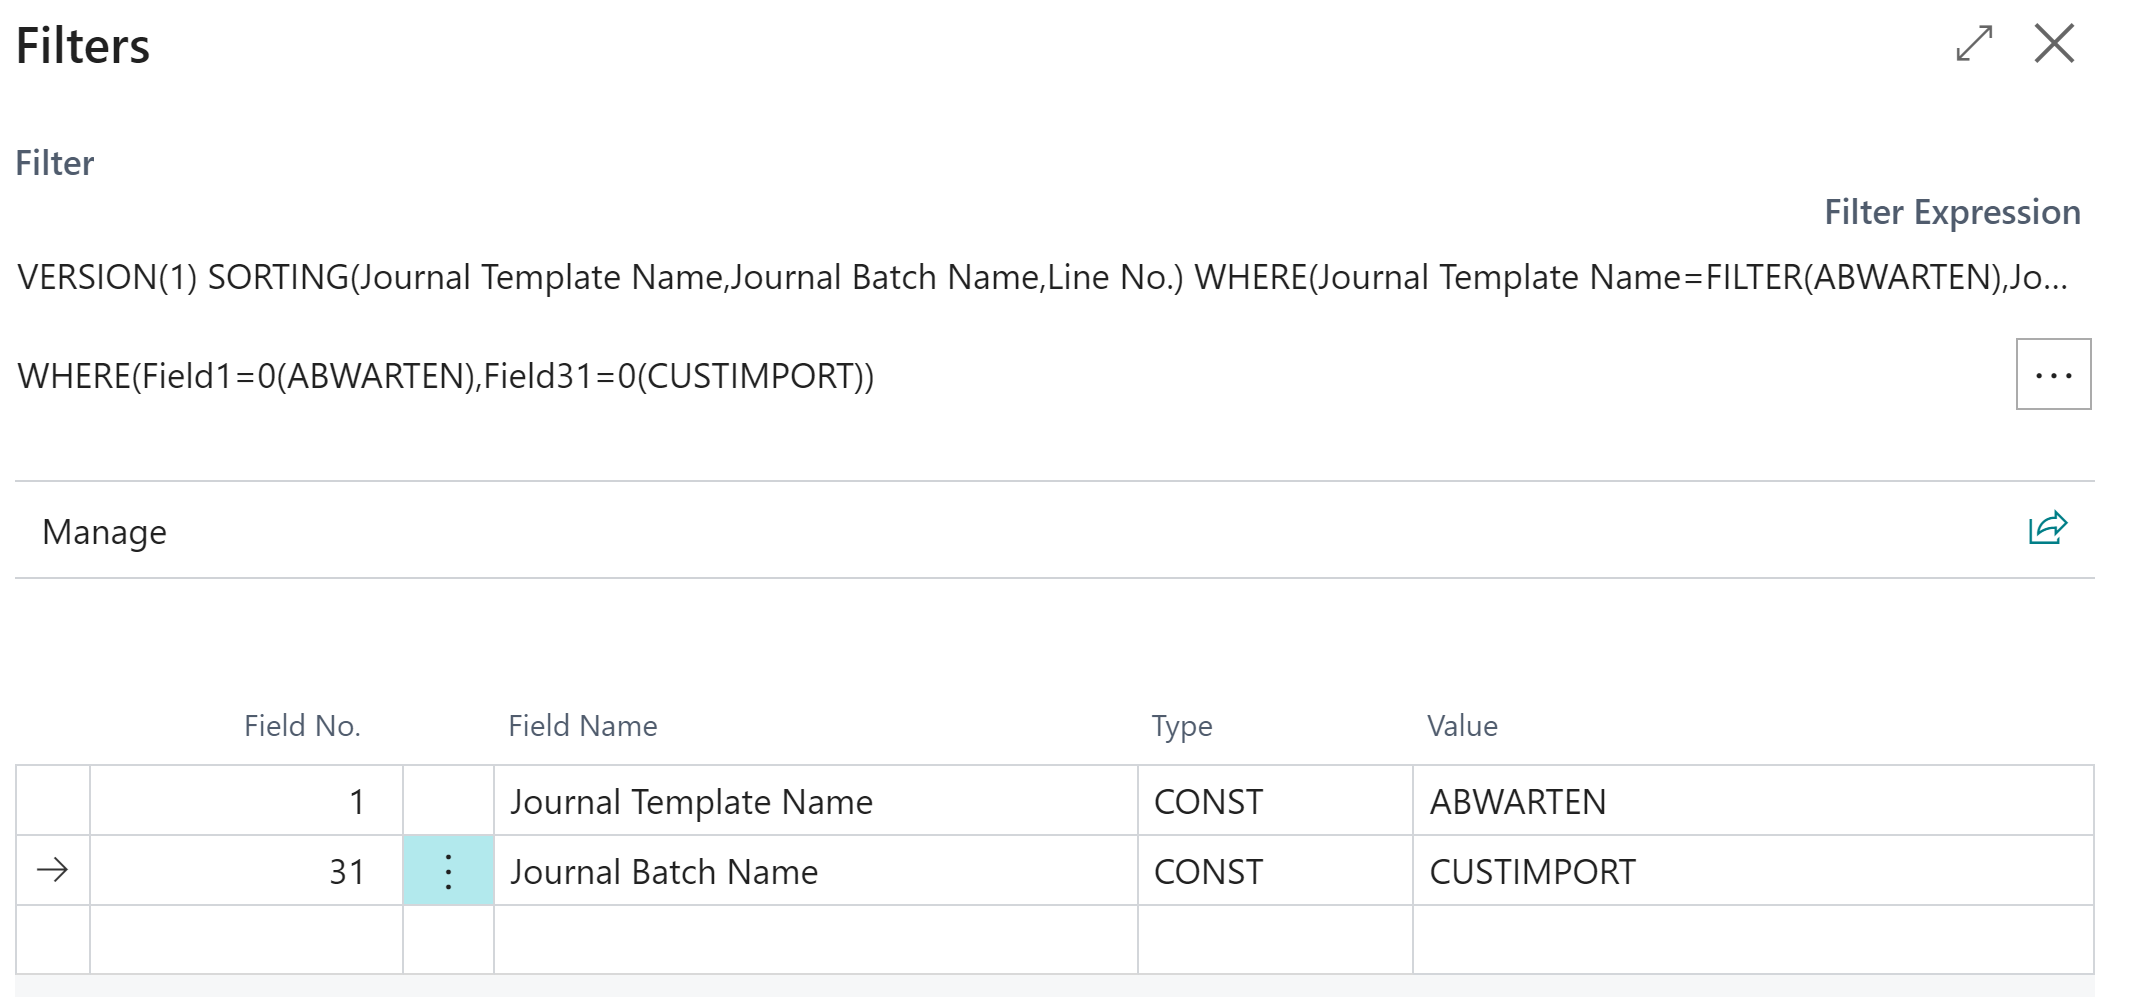
The filter/parameter should be setup as well, to only assign documents in the newly created batch: